
Login to your Zoho account using "https://sites.zoho.com". After login
After login, the below dashboard appears. Click on Create New Website.
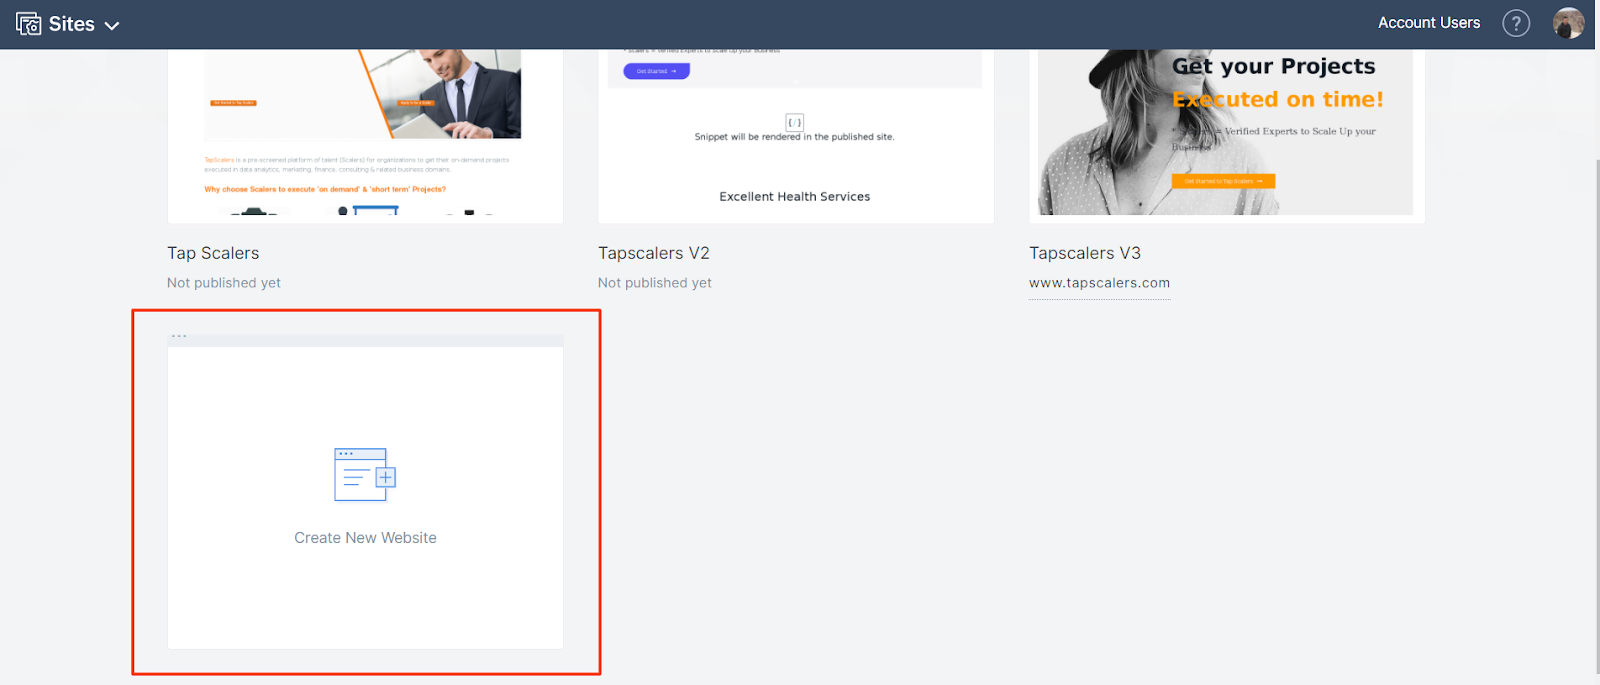
We need to select inbuilt themes. Give the name to the theme.
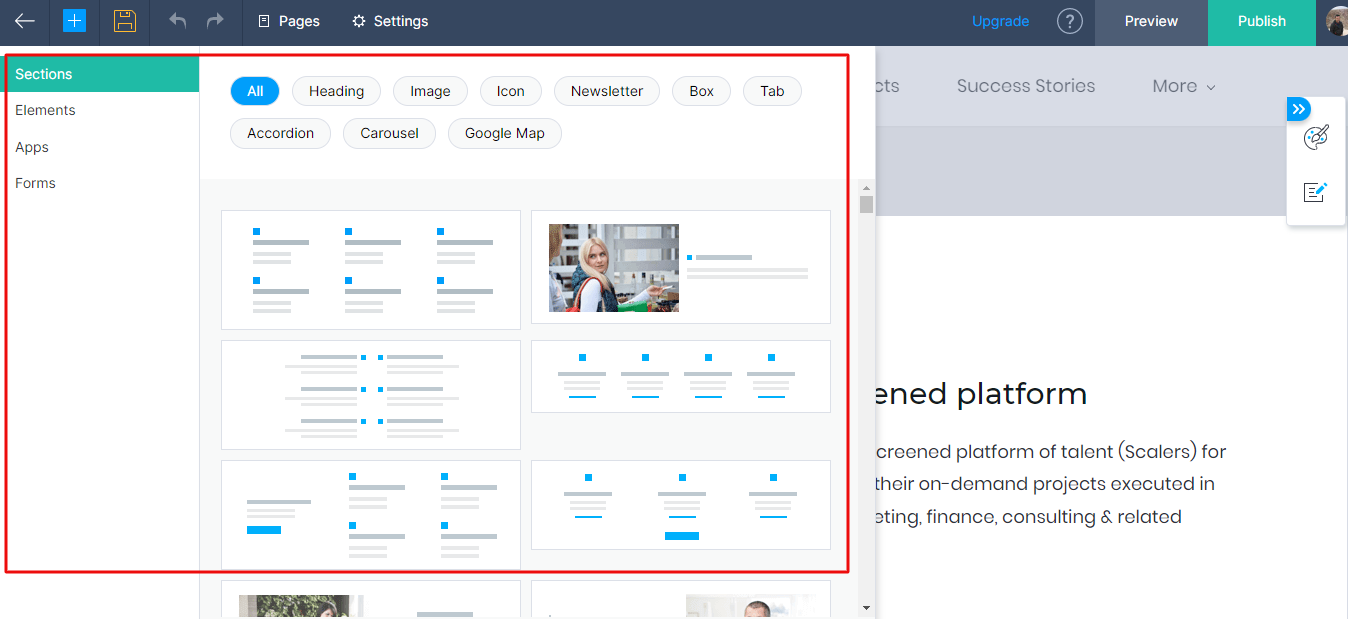
Drag and drop the pre-built sections, elements and forms as per the requirement and change the images and content.
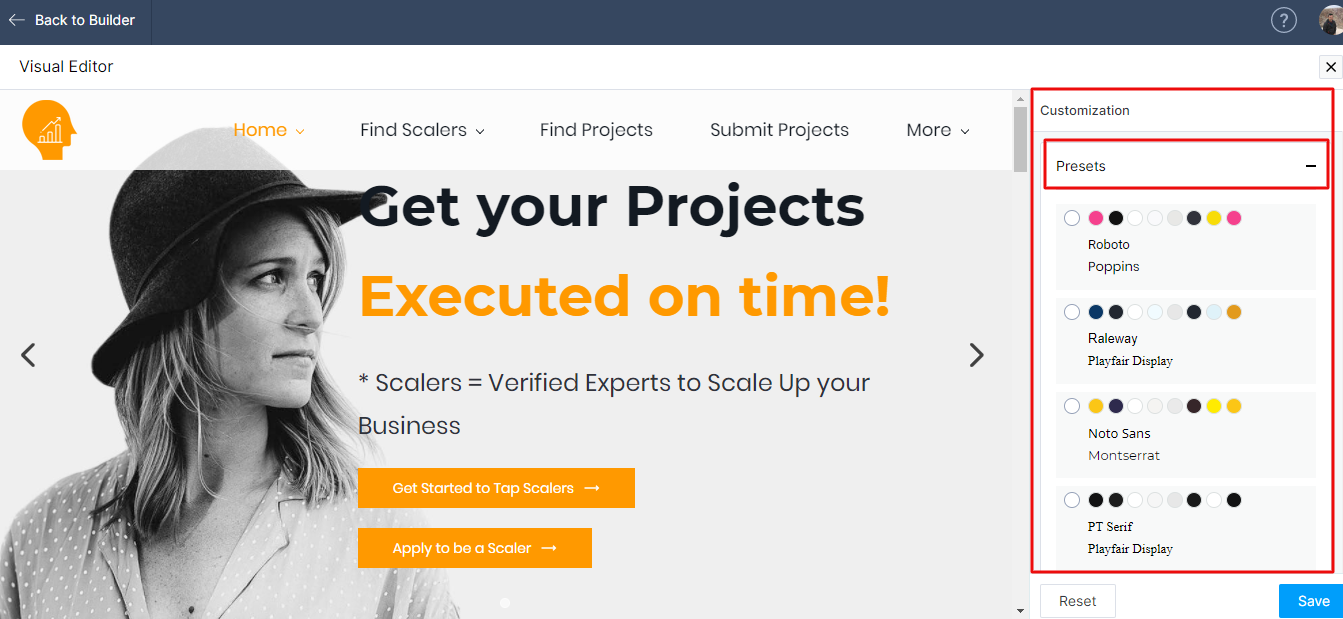
Click on the icon which is marked on the below screenshot to change the styles. We can change the color combination, font family and other styles using the visual editor.

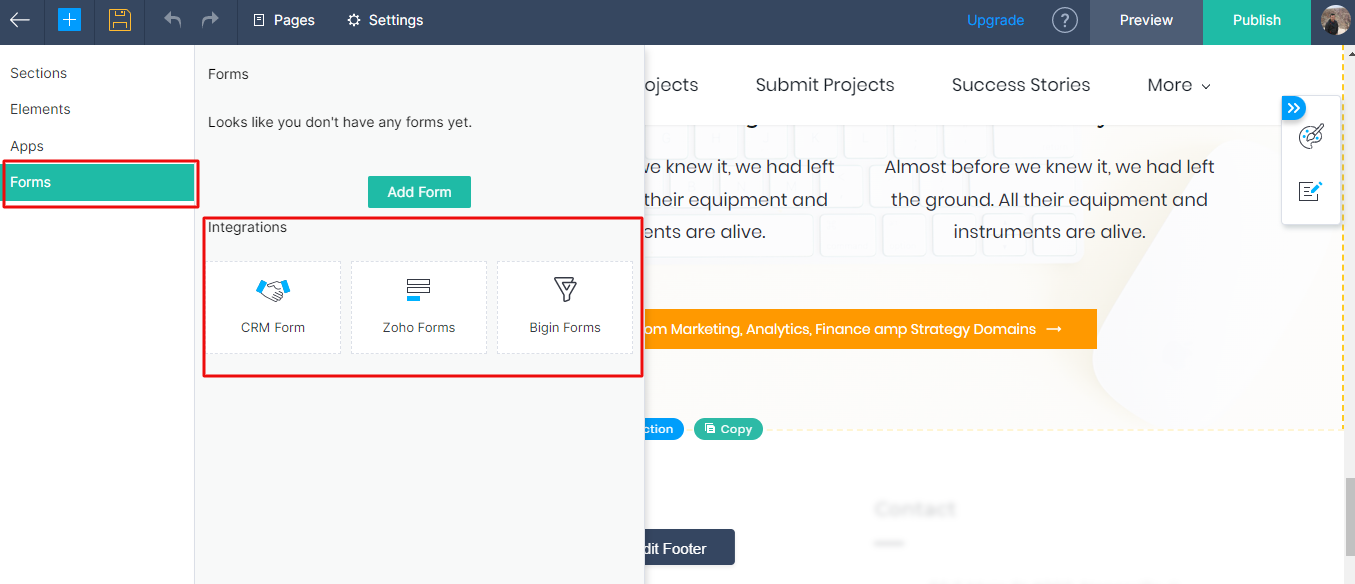
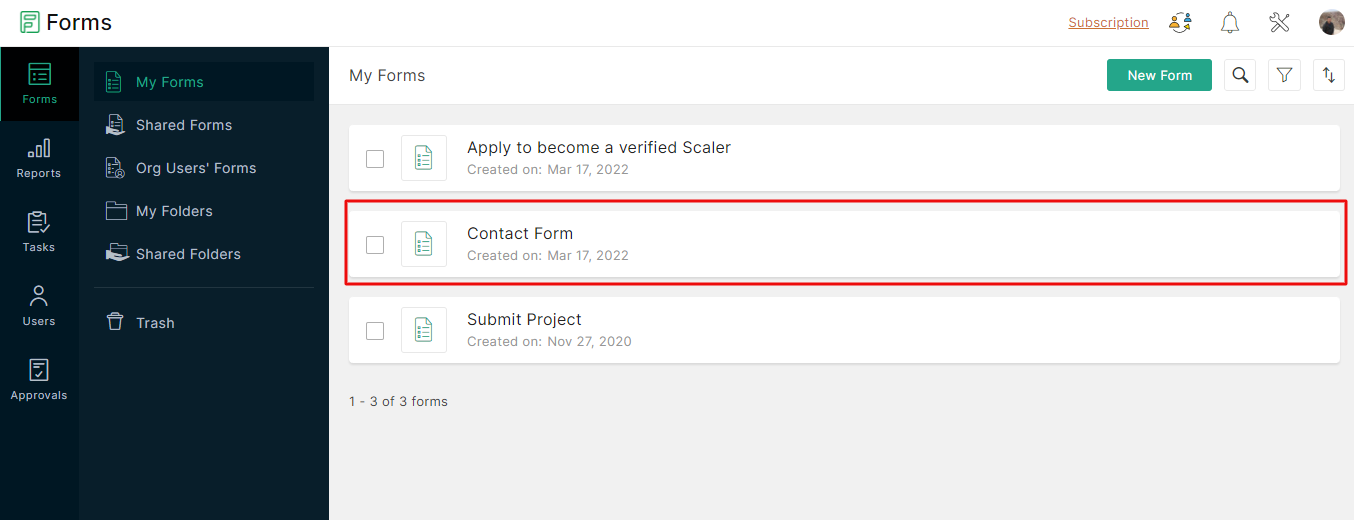
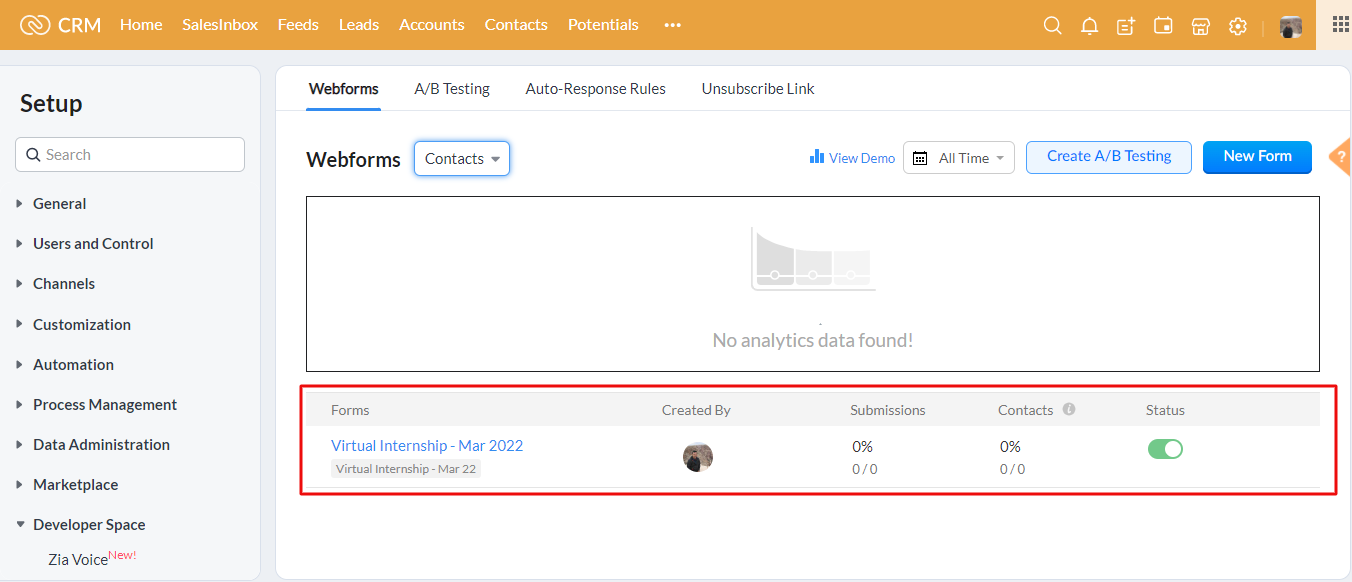
We can integrate forms with Zoho Forms, Zoho CRM or Bigin Forms. For that, we need to create the form in the above mentioned platforms as per our requirement and embed the code here.
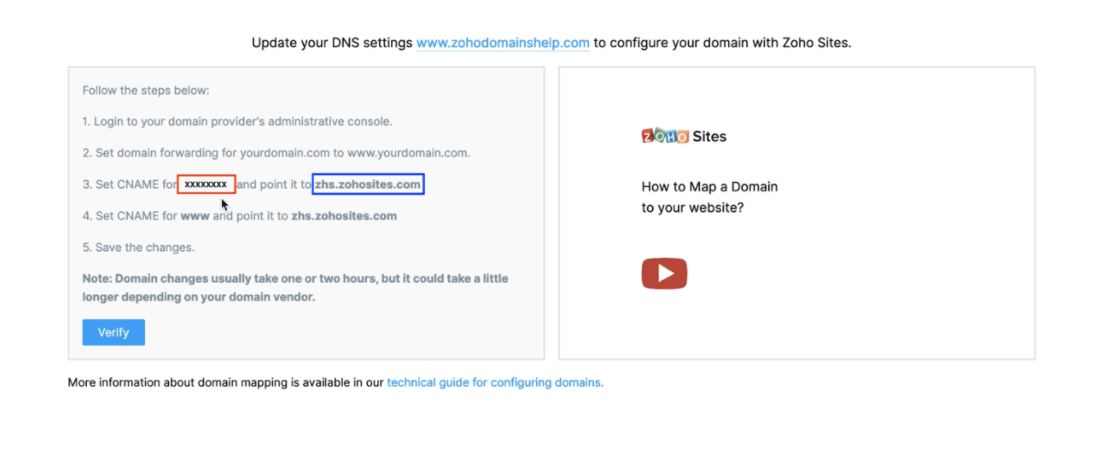
After designing the website and integrating the forms, we need to map the CNAME and update the DNS settings to configure the domain with Zoho Sites.
It is easy to use the inbuilt modules like carousel, header, accordions, tabs, footer etc.
Easy to drag and drop those modules and change the content and styles as per our requirement.
We can change the font family and font sizes easily so that it will be consistent across the website.
When we want to add the custom snippet, we need to give both styles and html at one place. We cannot separate stylesheet and HTML code.
We cannot add much javascript and effects.
We cannot add styles to the pre-built sections and elements available in the Zoho Sites.
Much customizations are not possible in the Zoho Sites.
Copyright © 2026 Website by NectarSpot Marketing, Automation, and Design Company