Testing is the basic activity to tracing out the bugs and solving technical issues in the source code of a website and assessing the overall product functionality, performance, security, and compatibility with multiple platforms, browsers, and devices. It is part of the quality assurance and website development process.
Automation Testing is the testing technique to perform manual process by running some test cases using automation tool. Here you can automatically tracing out the bugs of a website and assessing the overall product functionality, performance, security, and compatibility with multiple platforms, browsers, and devices.
Automation Testing process will:
Here for automation testing with muliple browsers and OS compatibility we need to follow 4 steps.
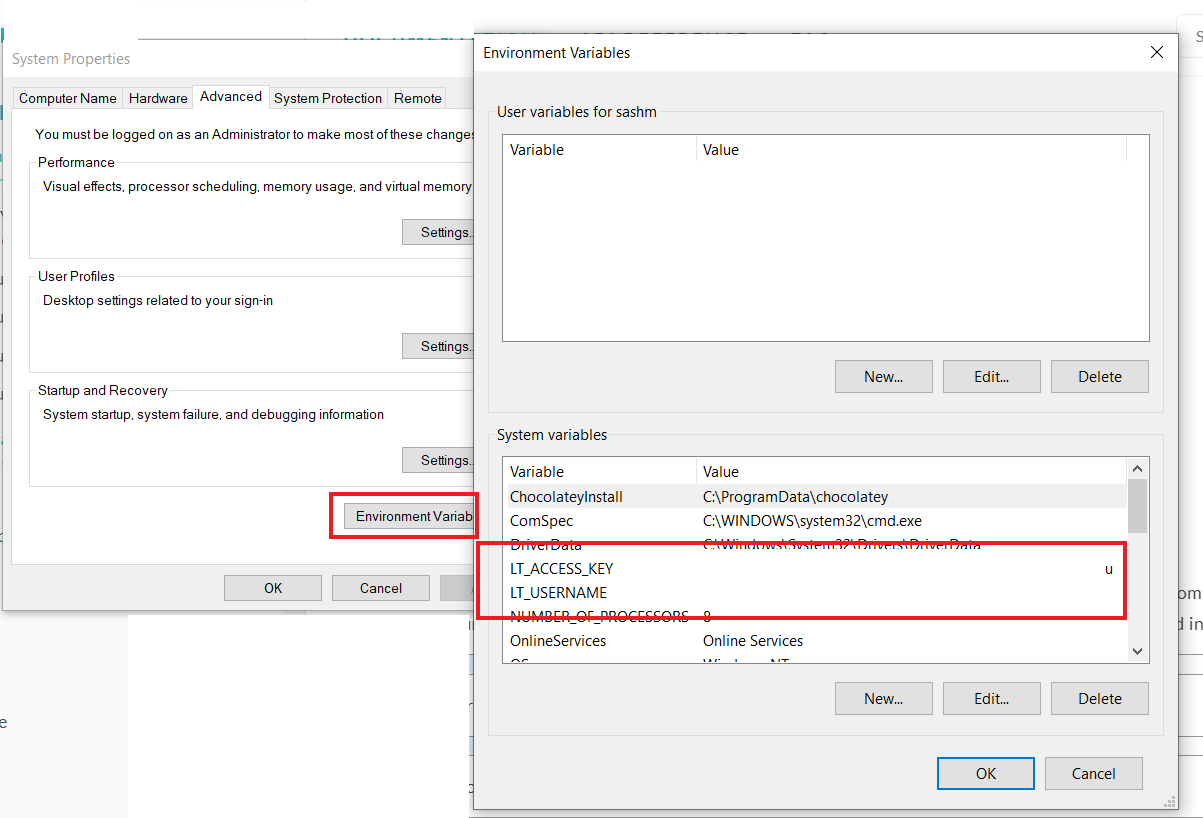
1. Copy the automation credentials like “Username” and “Access Key” from Lambda Test Console.
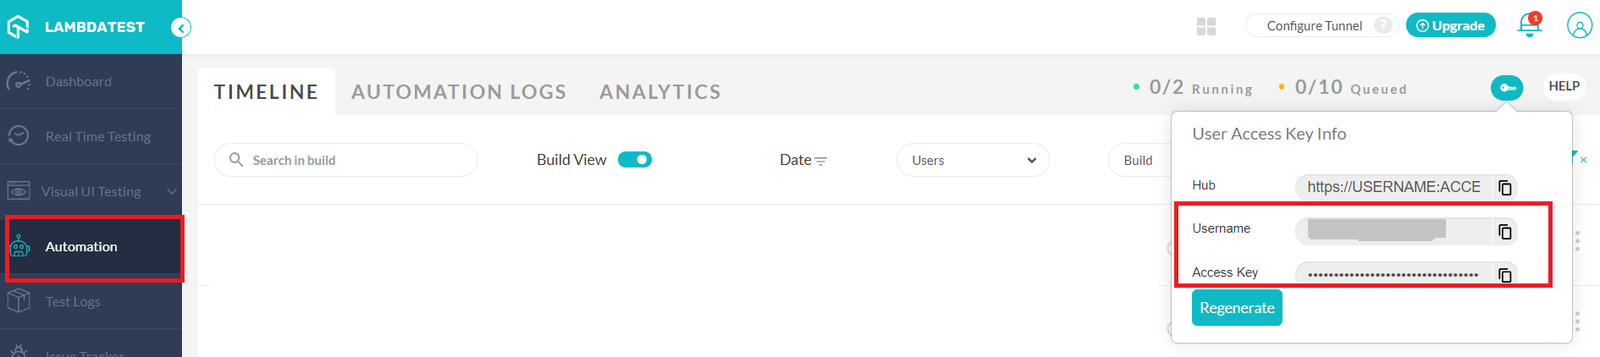
2. Add those “Username” and “Access Key” on our “Environment Variable” via Control Panel. Steps to add in Environment Variable:
1. Install Python
python --version
2. Install Pytest
pip install –U pytest
pytest --version
python -m pip install --upgrade pip
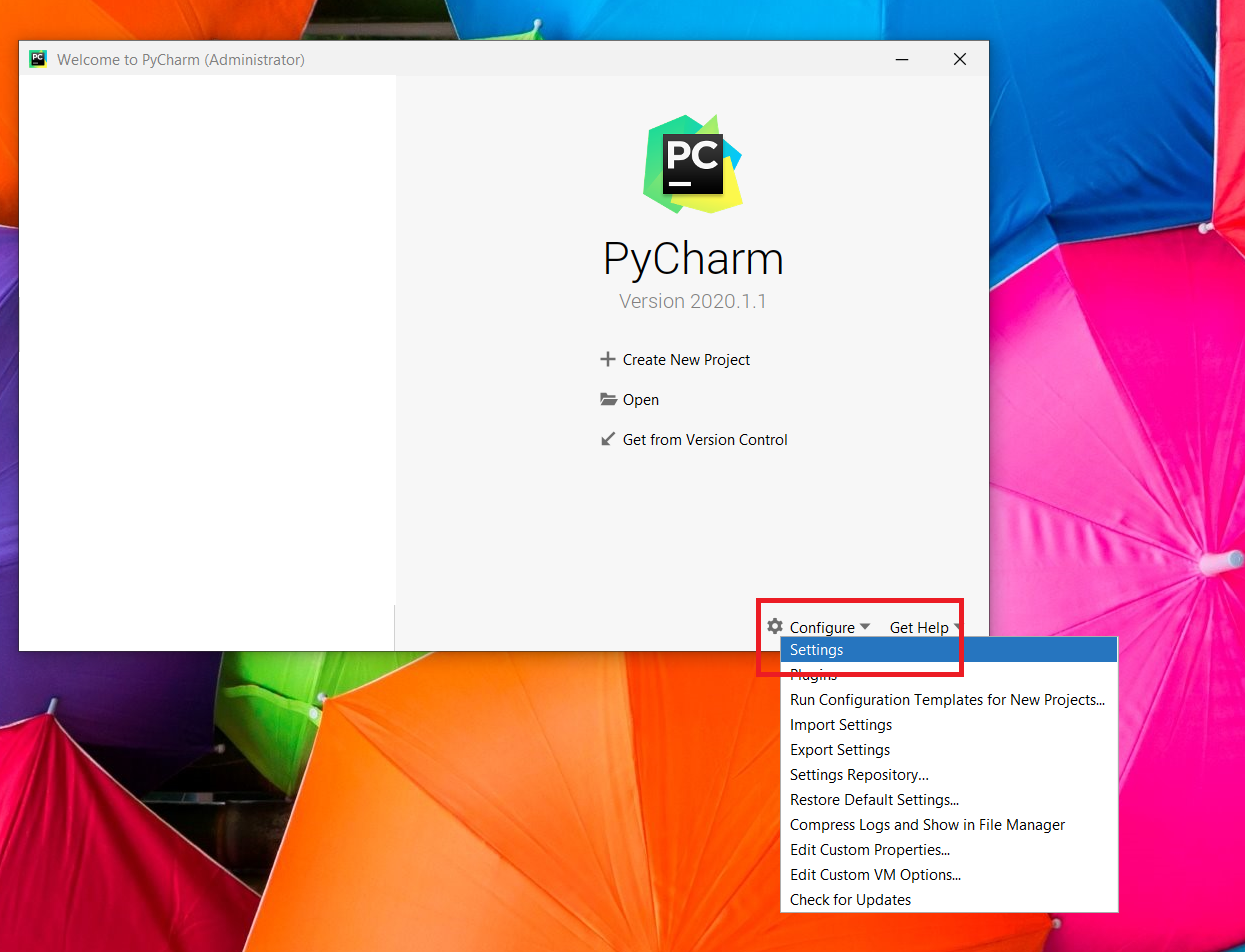
3. Install Pycharm
1. Make pytest as a default runner tool

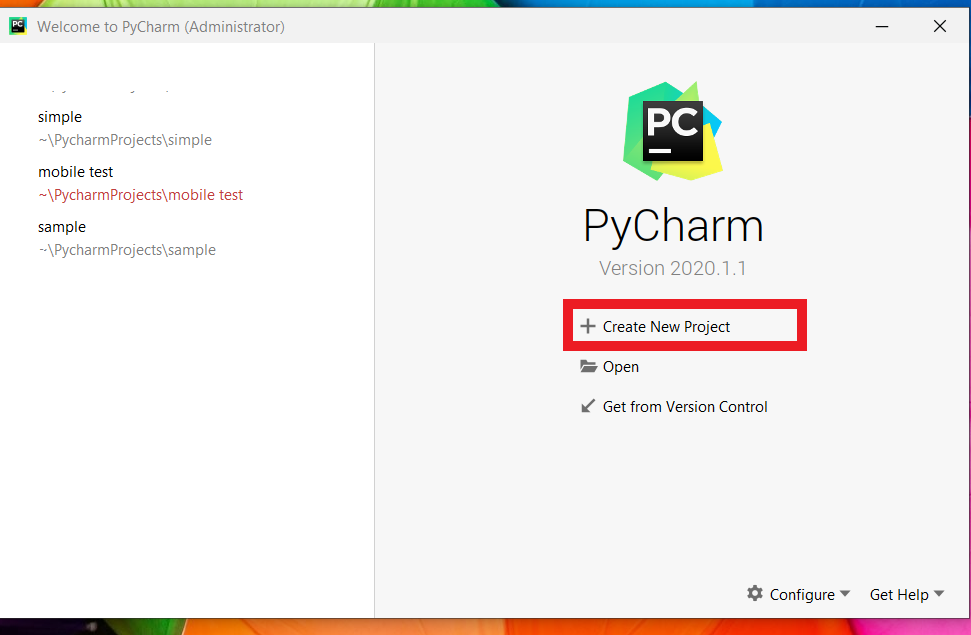
2. Create a Project
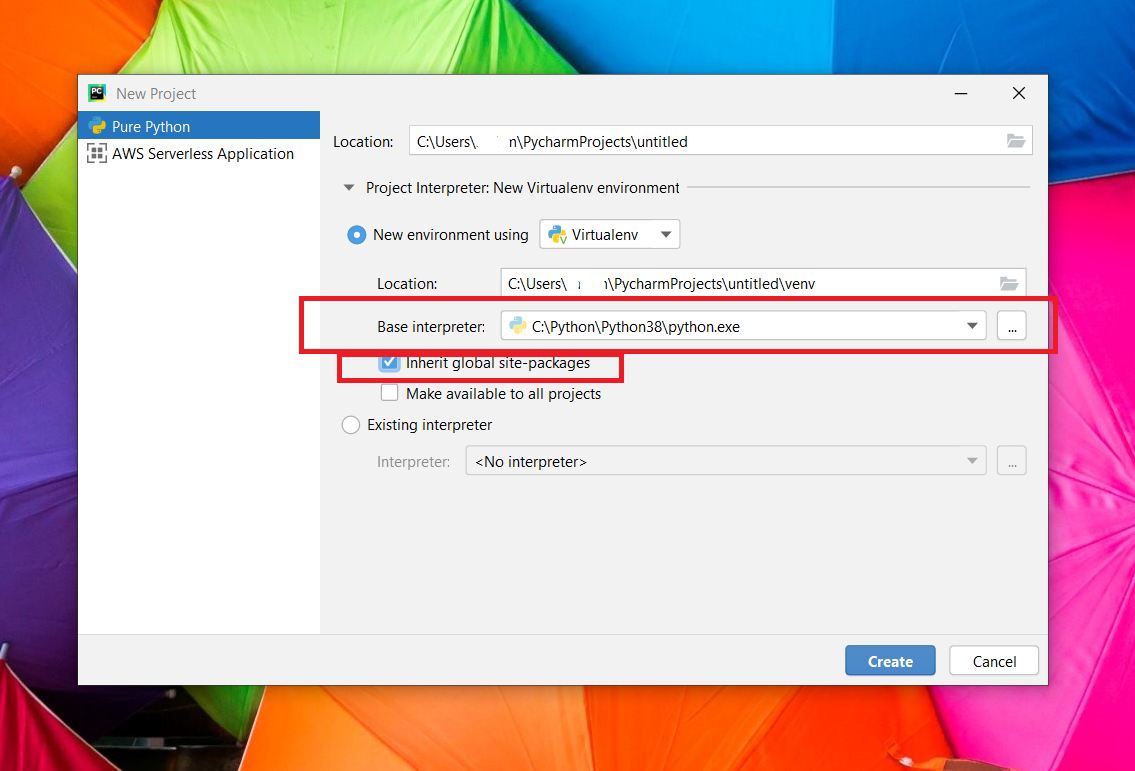
3. Add selenium libraries
pip install -U selenium
Note: Install appium library for mobile devices.
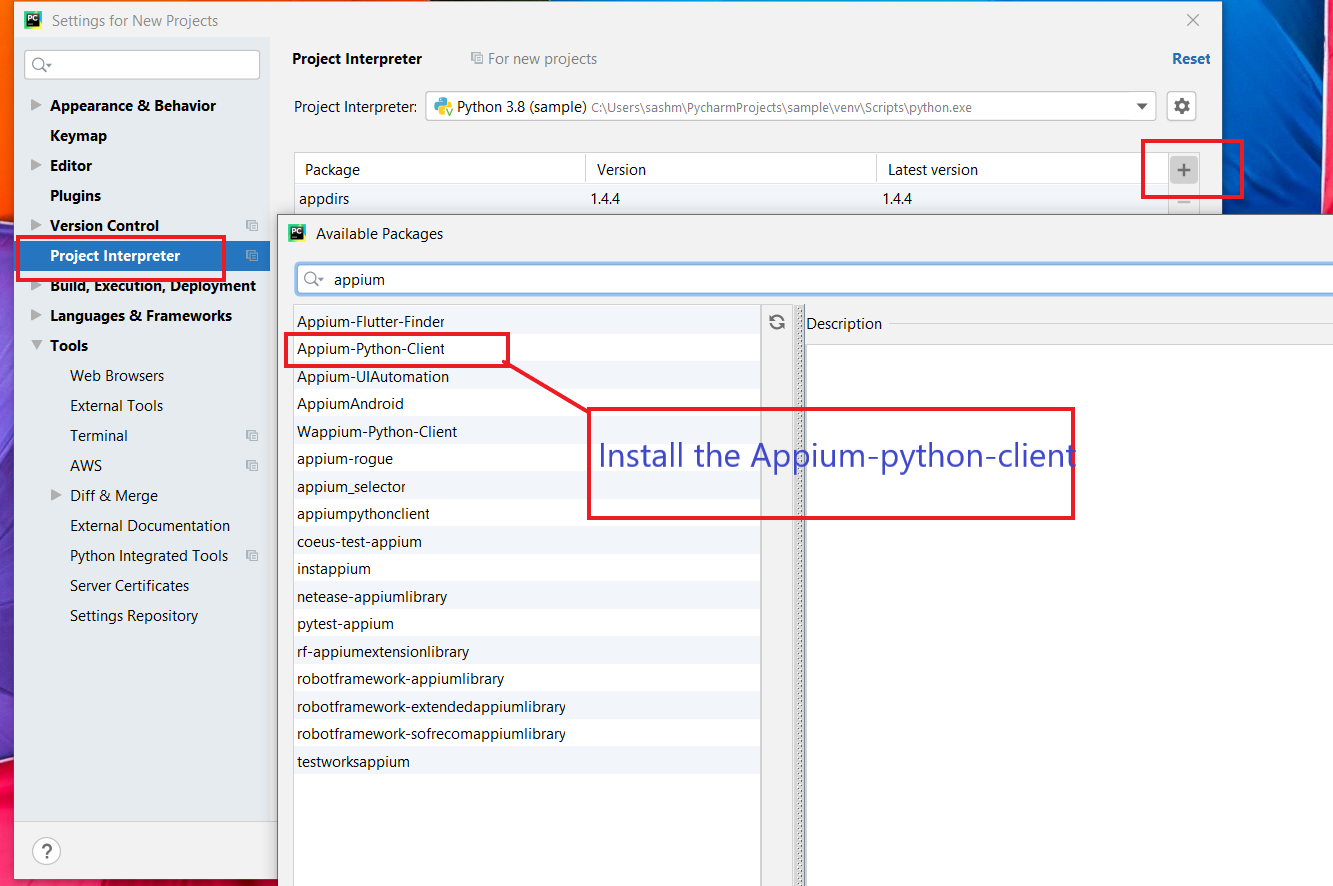
4. If we want to prform automation testing for mobile and ipad devices then we need to add appium package otherwise for desktop we need only selenium libraries.
pip install Appium-Python-Client
5. Or we can directly add the library on our PyCharm console by the following steps
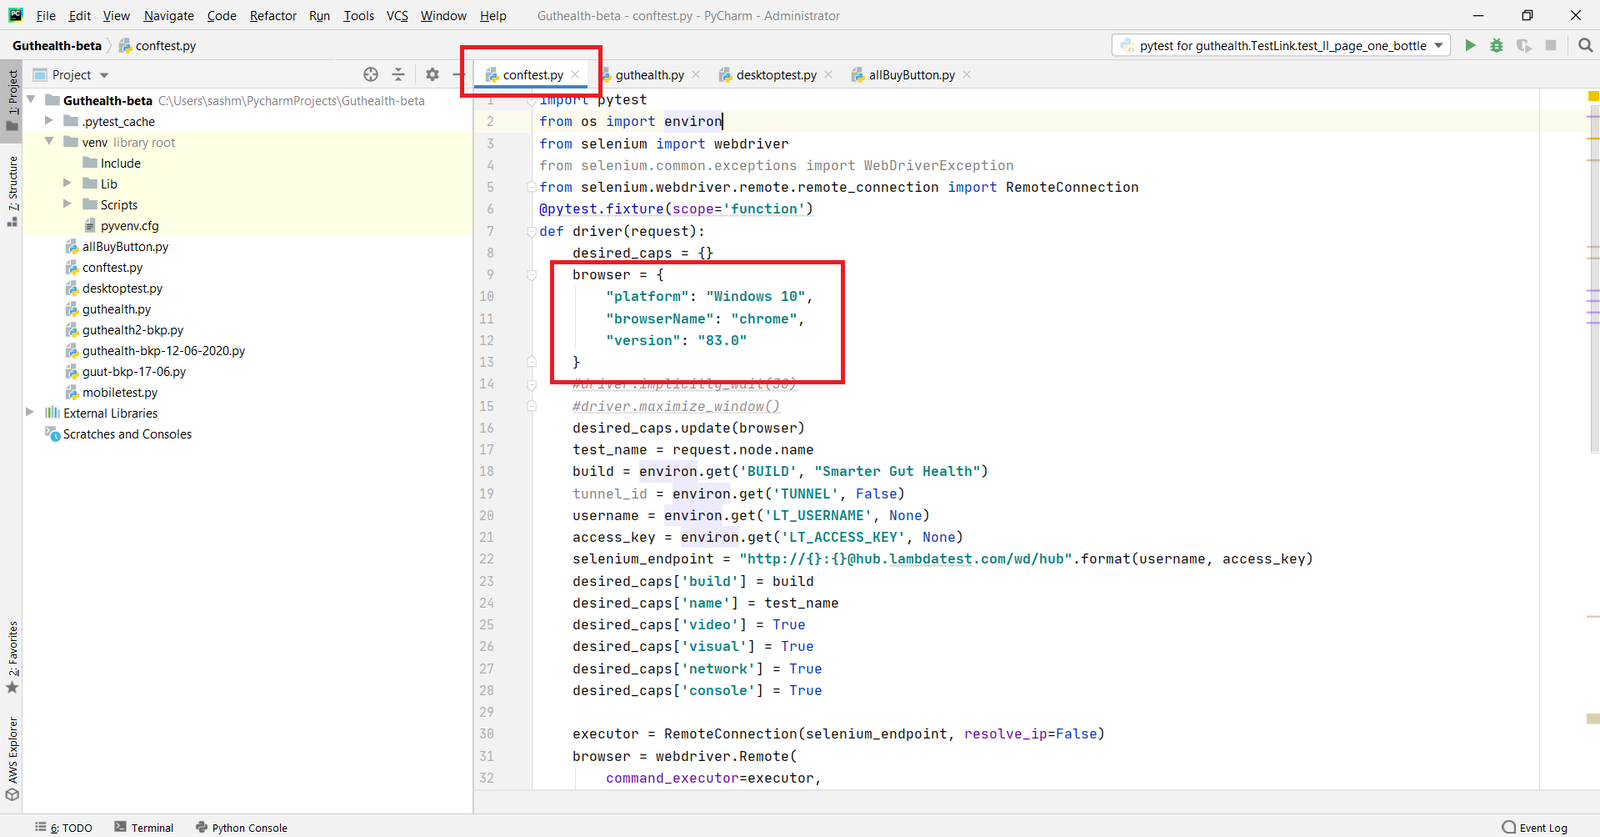
A. Create a Selenium Remote Webdriver and add the browser where we want to run the Automation testing
1. Create conftest.py and also you can refer the code from here.
2. Here we need to add the browser information of which platform and browser we want to perform the automation testing.
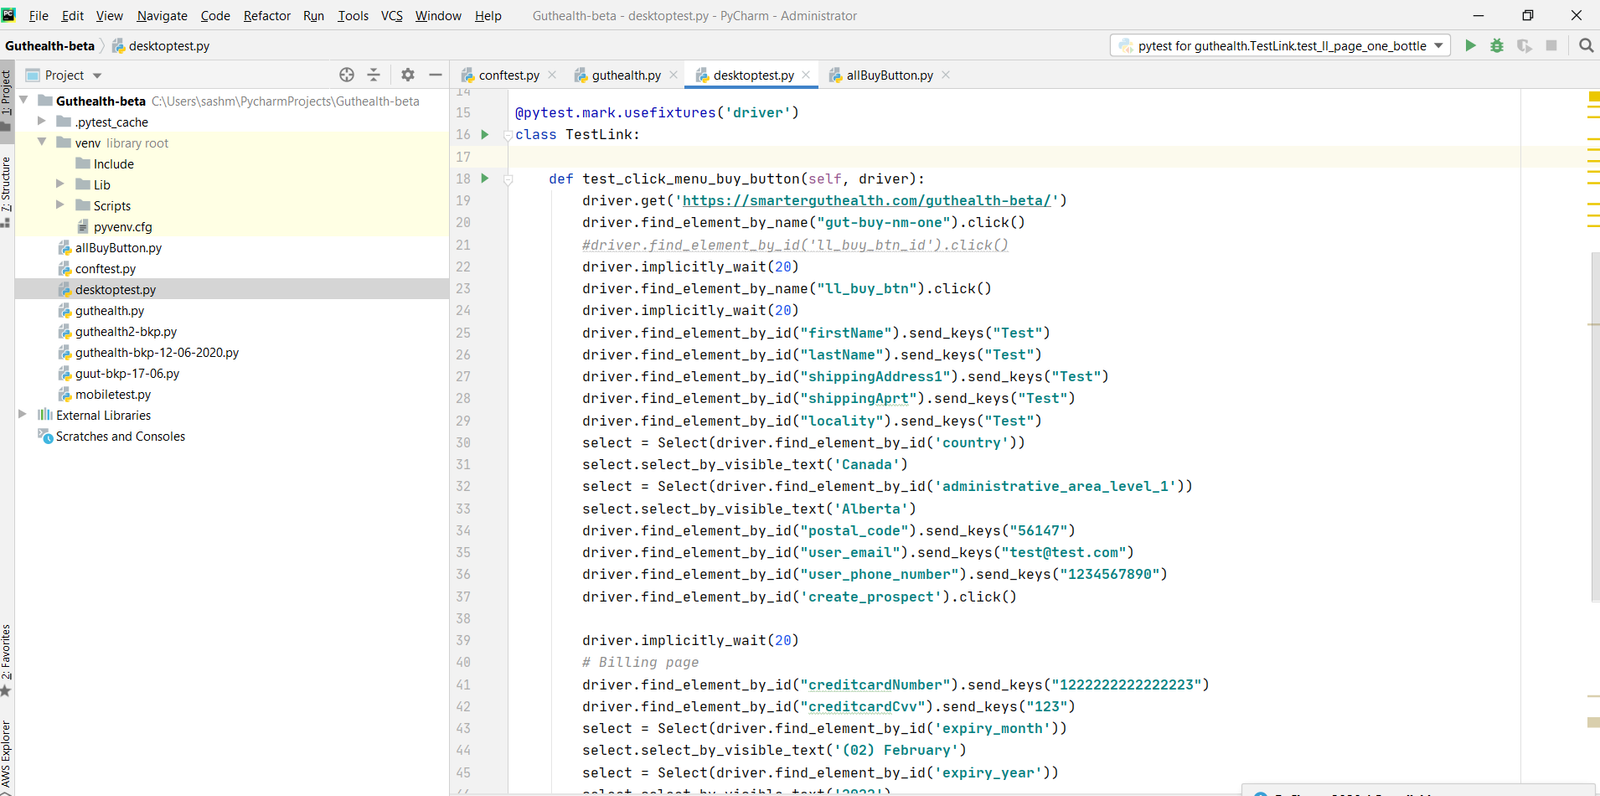
B. Creating a class and adding the test cases
Let see an example how the process flow while ordering a product from a website :
1. Click the Buy Now button and navigate from the home page to the next page.
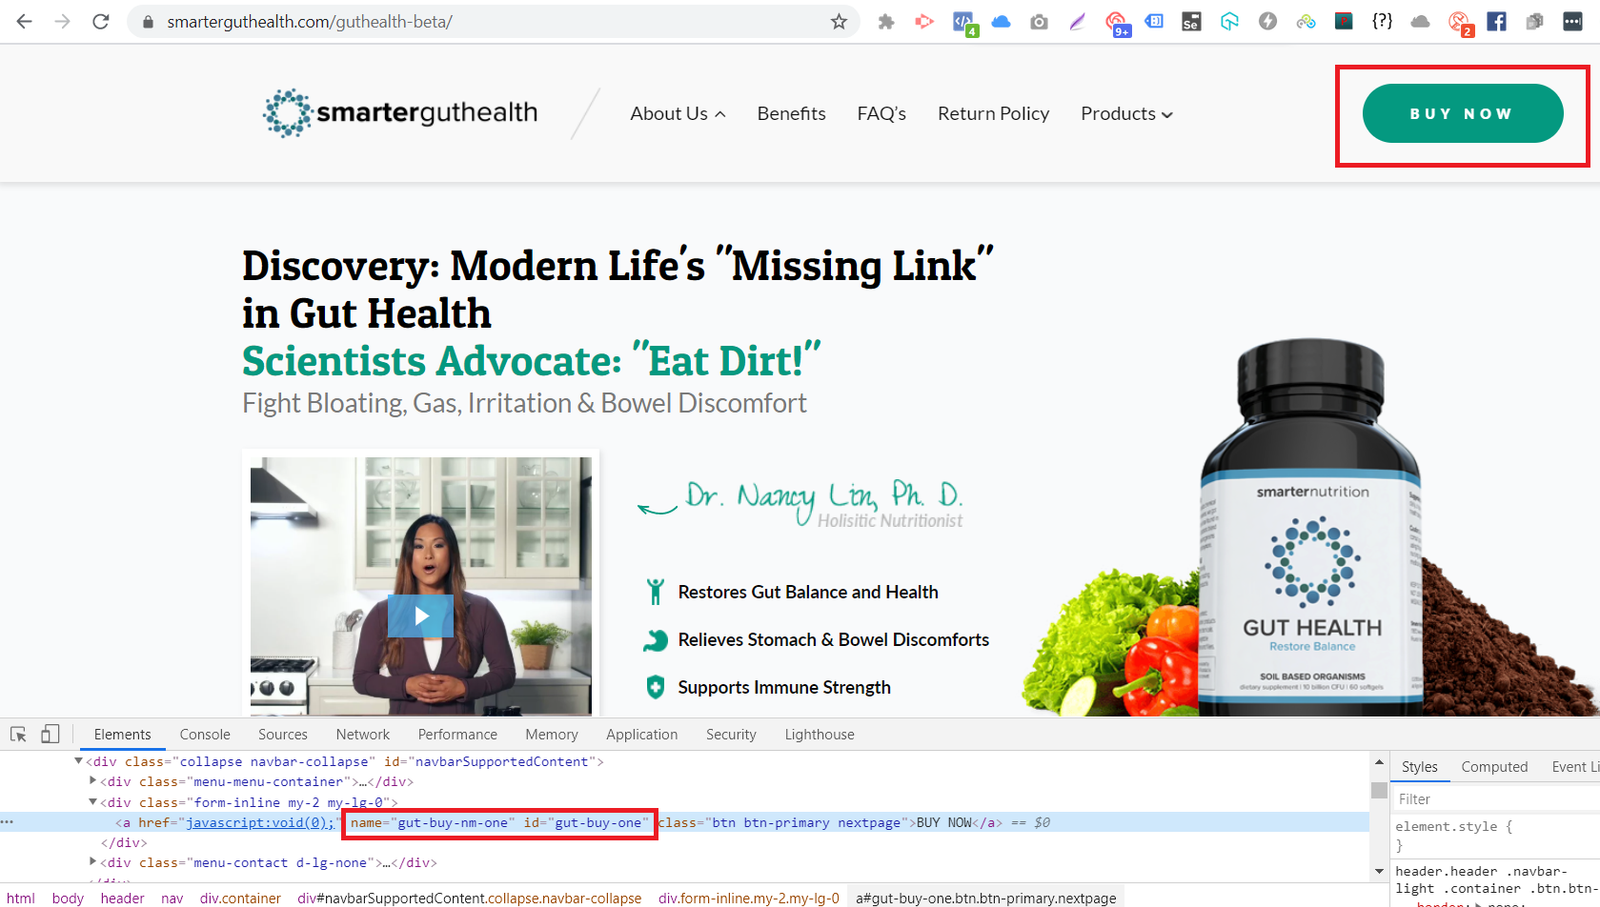
driver.get('https://smarterguthealth.com/guthealth-beta/')
driver.find_element_by_name("gut-buy-nm-one").click()
2. Click the Buy Now button and navigate to the next page (In our case the 1 bottle and one-time purchase by default selected. If you want to select other bottle use script for the select item)

driver.implicitly_wait(20)
driver.find_element_by_name("ll_buy_btn").click()
3. To fill the Shipping details
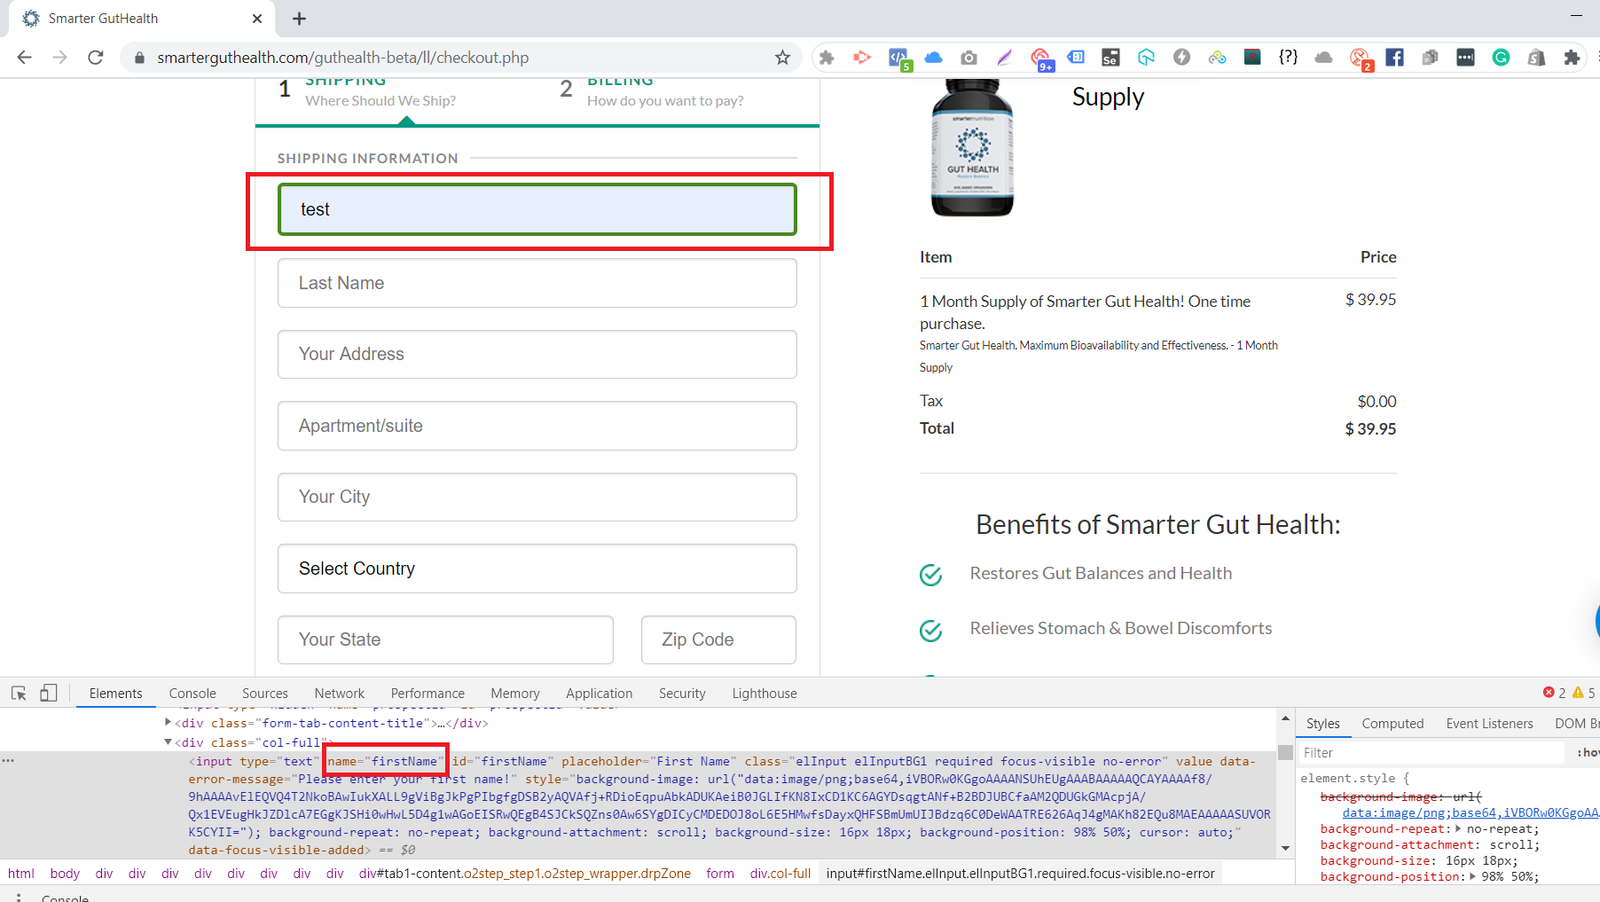
driver.find_element_by_id("firstName").send_keys("Test")
4. To click the “Go to Next Step” button and navigate to the billing page
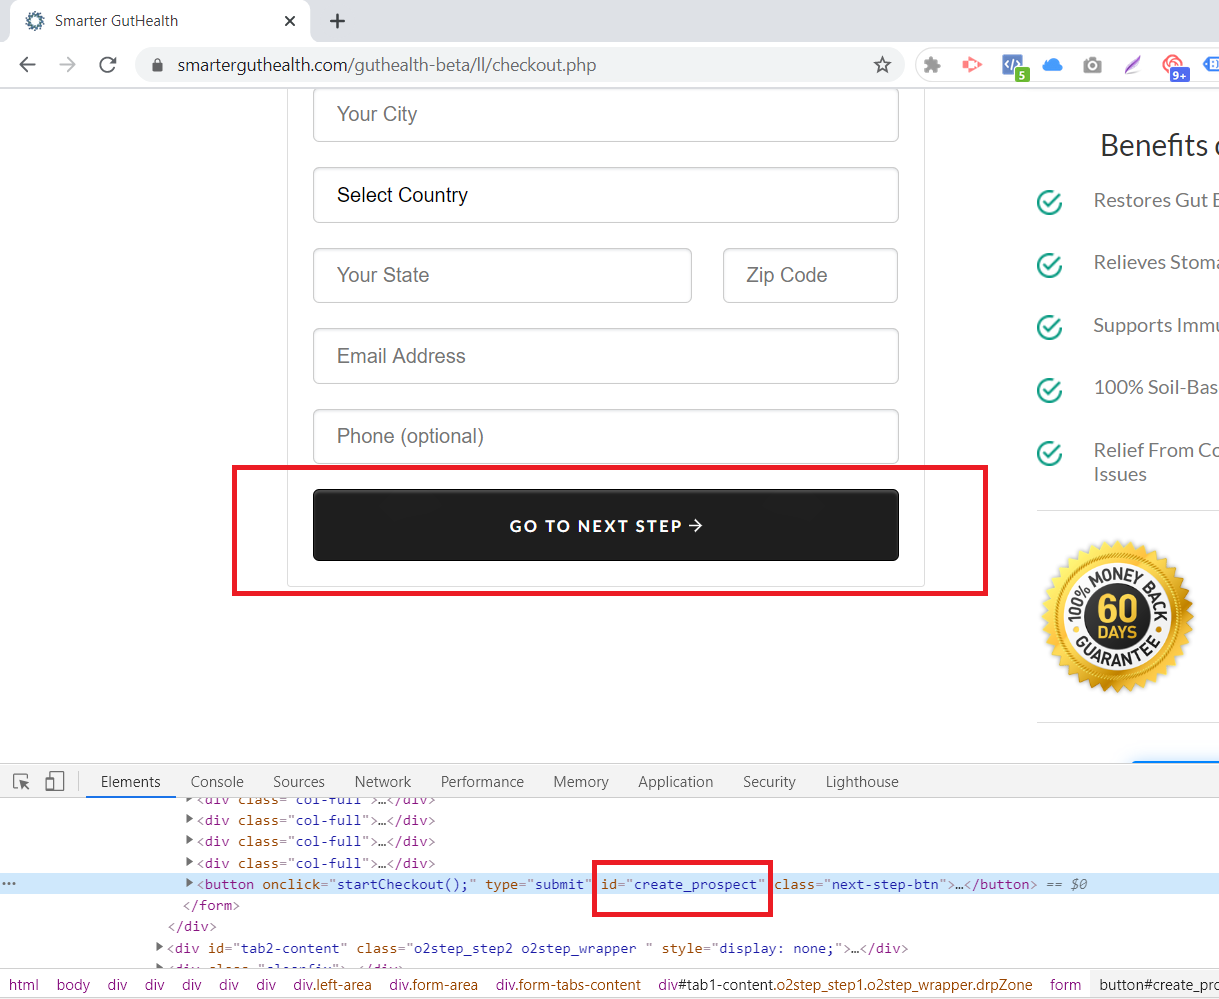
driver.find_element_by_id('create_prospect').click()
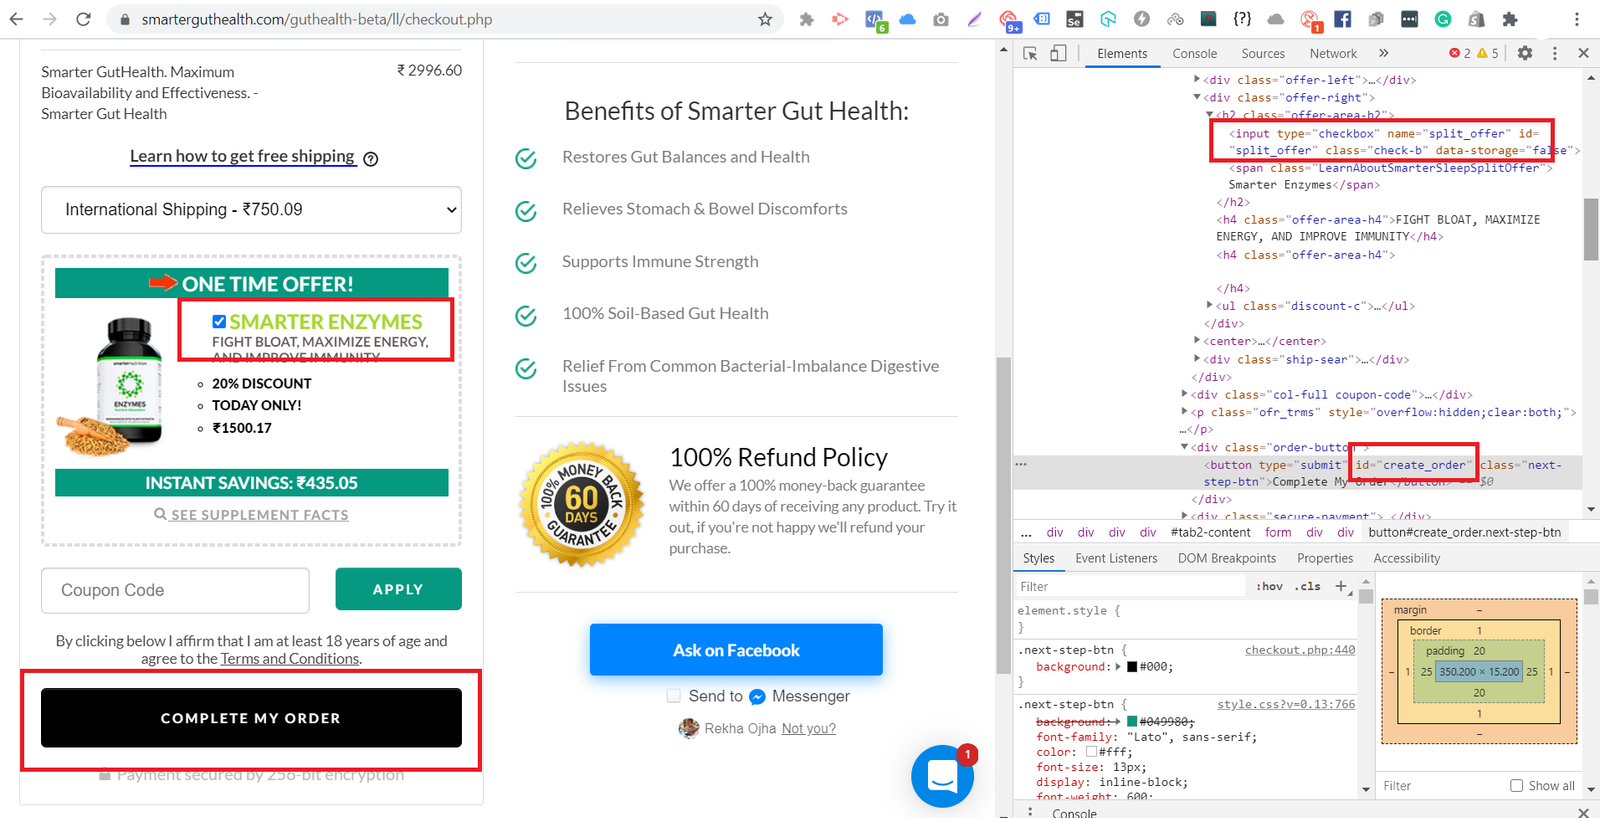
5. To fill the billing details and select order and click the submit button for navigating to oto1 page
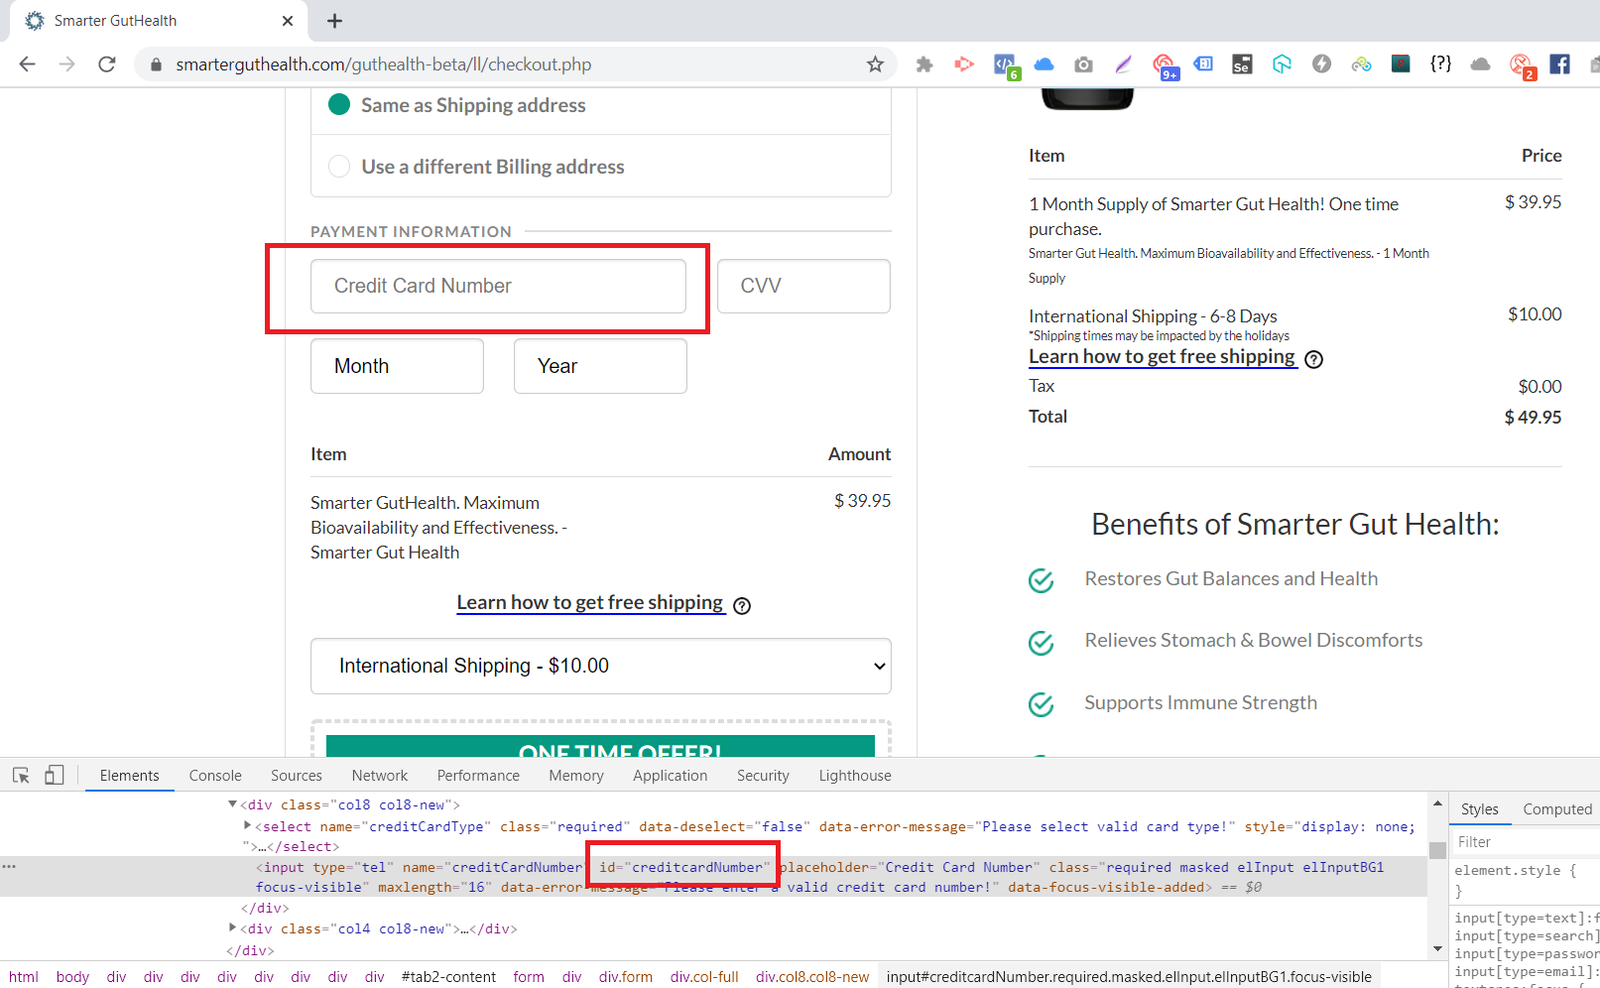
driver.find_element_by_id("creditcardNumber").send_keys("122xx4")
6. Click I want this deal button
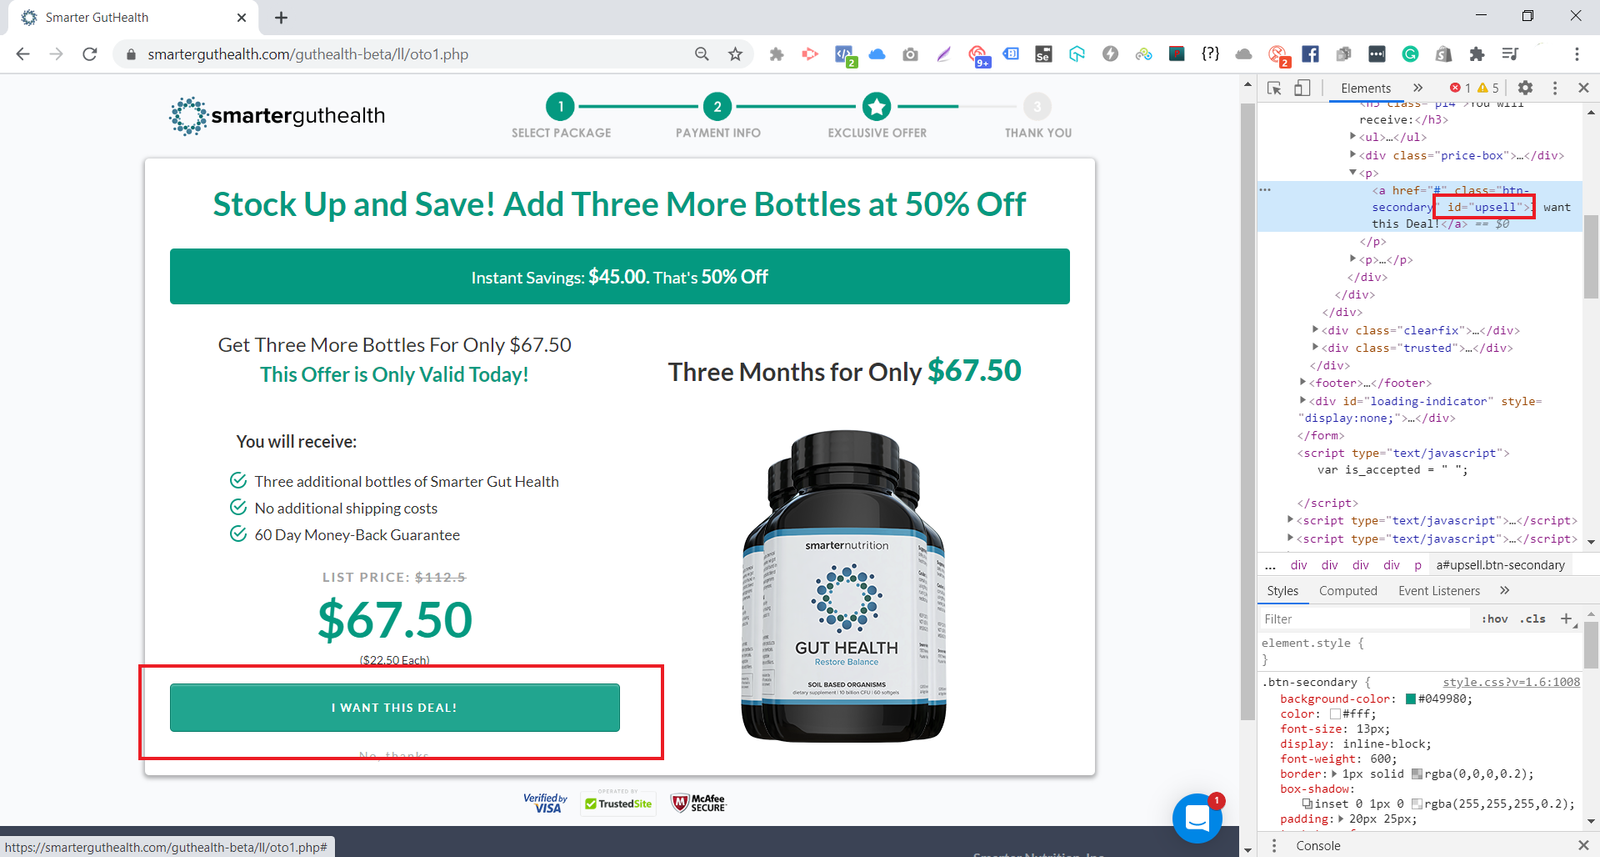
driver.find_element_by_id('upsell').click()
Similary, add the testing script for upsell2 page.
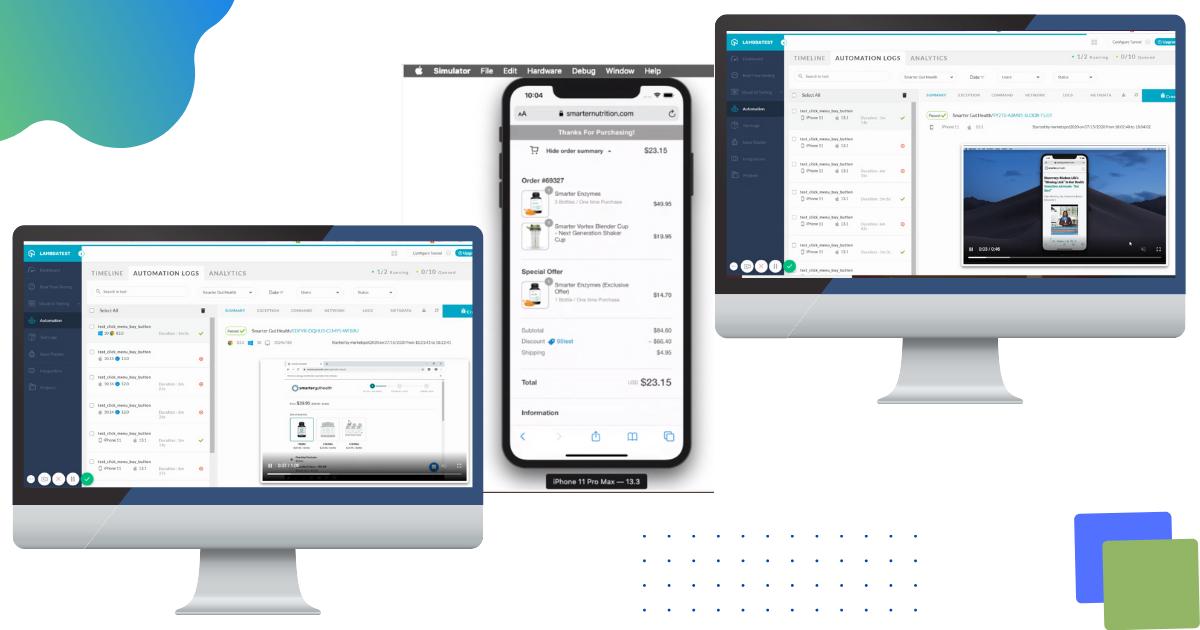
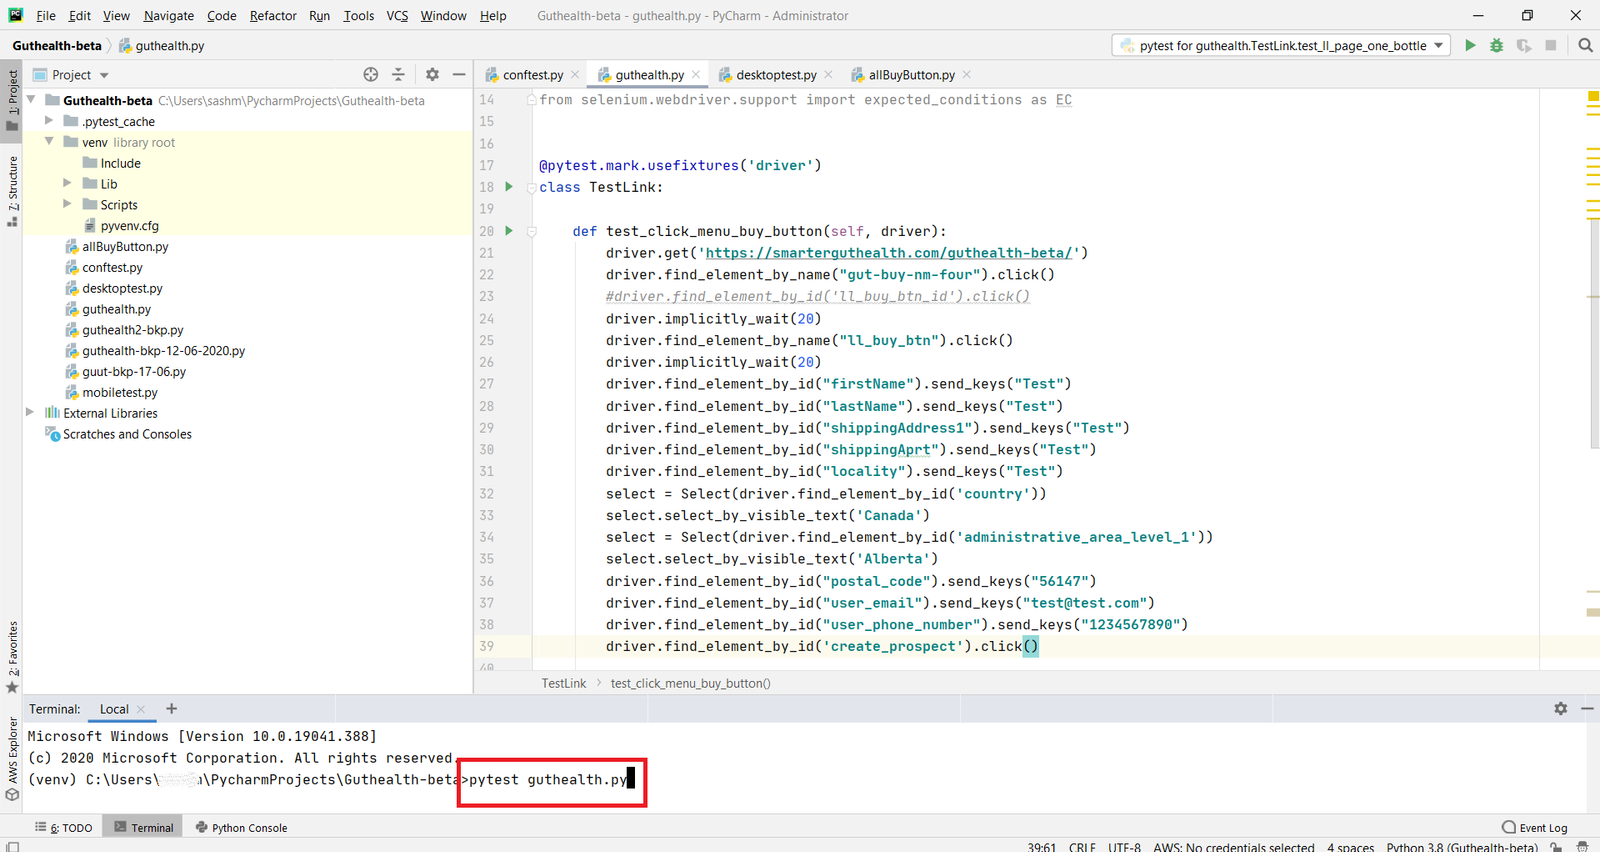
7. Finally to execute the test case we need to run the command like
pytest guthealth.py
guthealth.py is the file name where we added the test scenarios which we want to run for automation testing.


NectarSpot Inc. is an integrated digital marketing company specializing in Design & Development of Web, Mobile & Voice Applications.
Our award winning team excels in providing redesign, optimization, automation, and analytics services to companies at various growth stages.
Contact us today to get your project started.


Copyright © 2026 Website by NectarSpot Marketing, Automation, and Design Company