
The e-Commerce Developers can unlock the subscriptions and recurring the billing for their customers by using Recharge App on their Shopify or ShopifyPlus Store. The App solves complex subscription and billing needs problems, with a lot of automation and customization available, and also programmatically can update the customer subscription via your application.
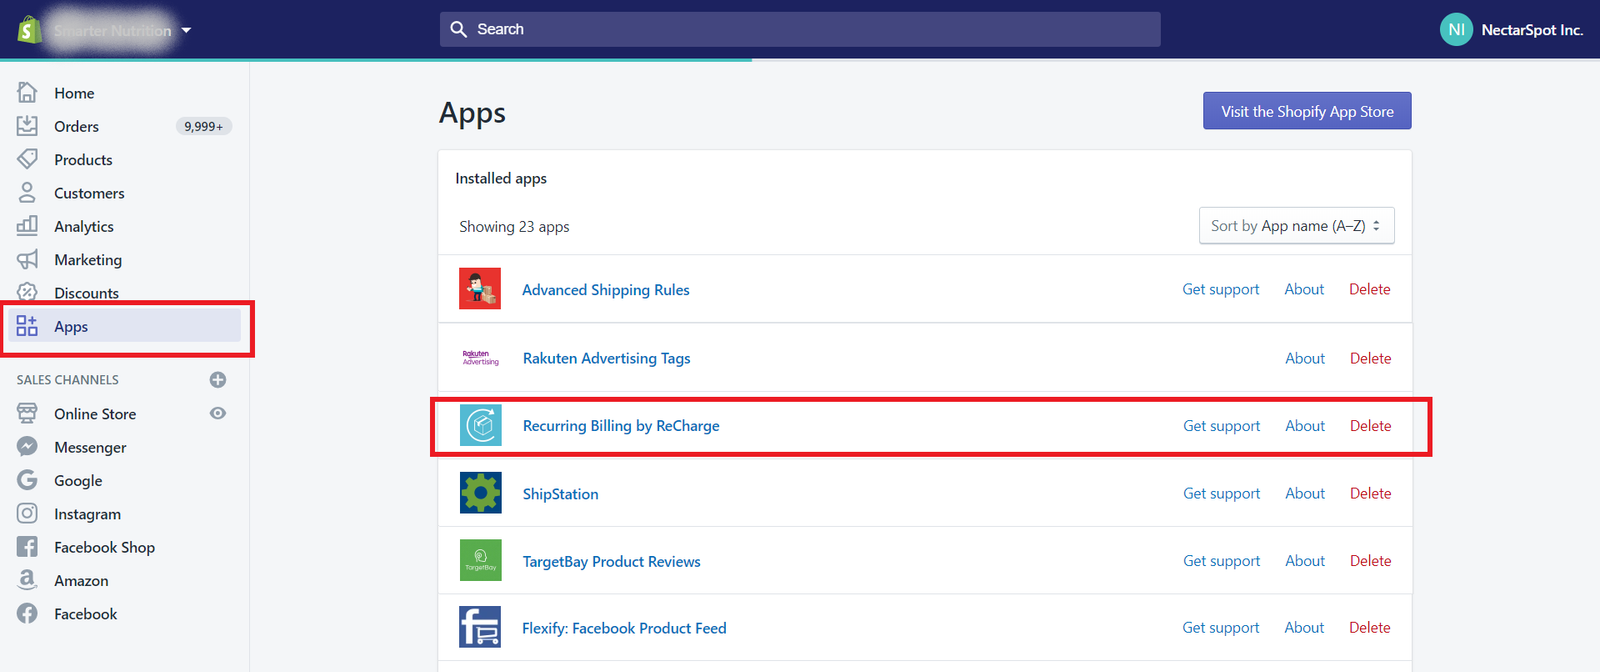
On the Shopify store under the “App” Section need to select the Recharge App
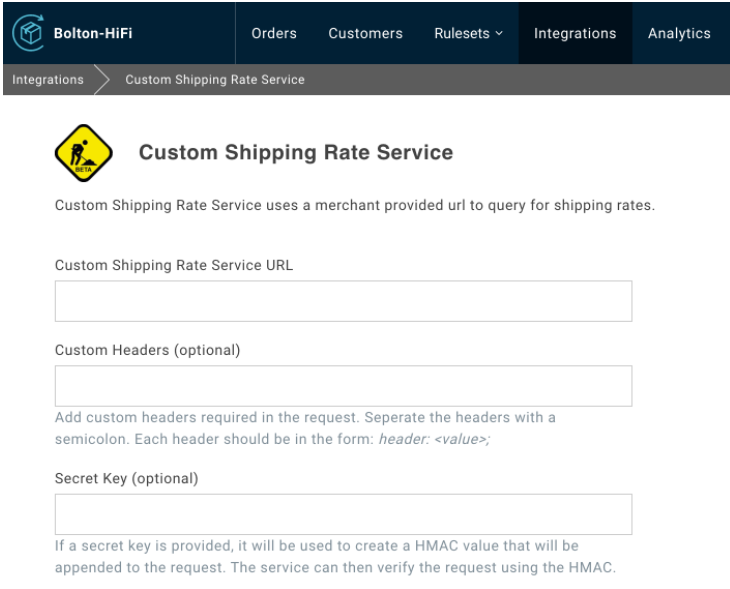
1. Go to the Integrations page and navigate to All Integrations and select “Custom Shipping Rate Service”

2. Fill in the URL and header fields:
Use custom shipping service in a shipping zone:

Creating custom shipping rates API integration:
To use Custom Shipping Rates with ReCharge, you will need middleware that can return and receive payloads
Requirements: Your Custom Shipping Rate API must send and receive data over HTTPS using the application/JSON header.
HMAC support for your application and the ability to send/receive custom headers are optional.
Request headers:
Accept: application/json Content-Type: application/json
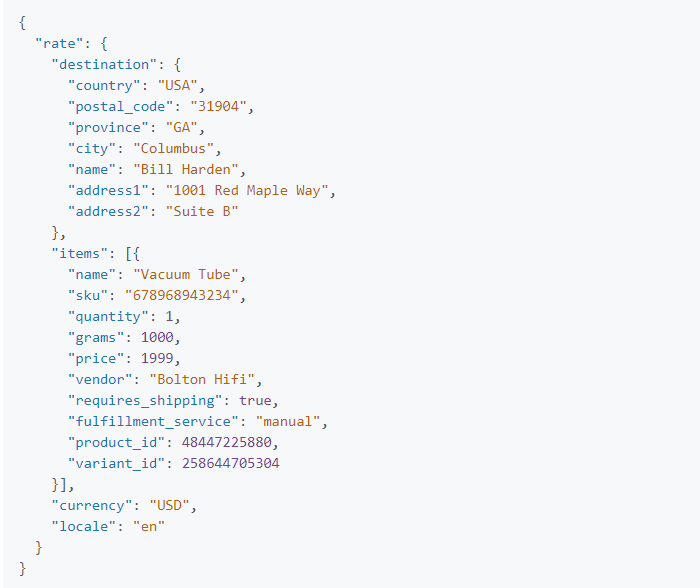
The ReCharge App will send a request to your callback URL with the below fields
Example request
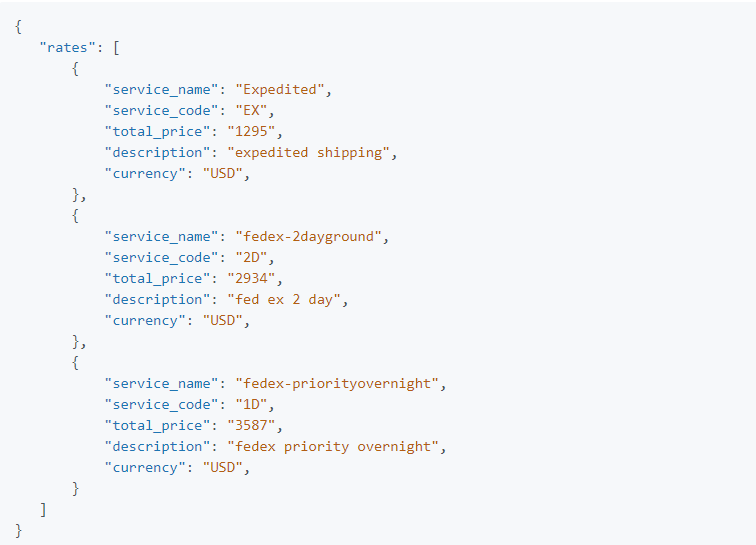
Response: The application should send a 200 OK response and JSON payload with the following properties.
Any response to ReCharge's request other than 200 will be considered an error.
Example response
Here can change the frontend look for the subscription widget by adding CSS
Navigate to your Shopify store and in the theme editor, open the theme code
Then click on the “Assets” folder and select “theme.css.liquid”. Here need to add the custom CSS for the subscription
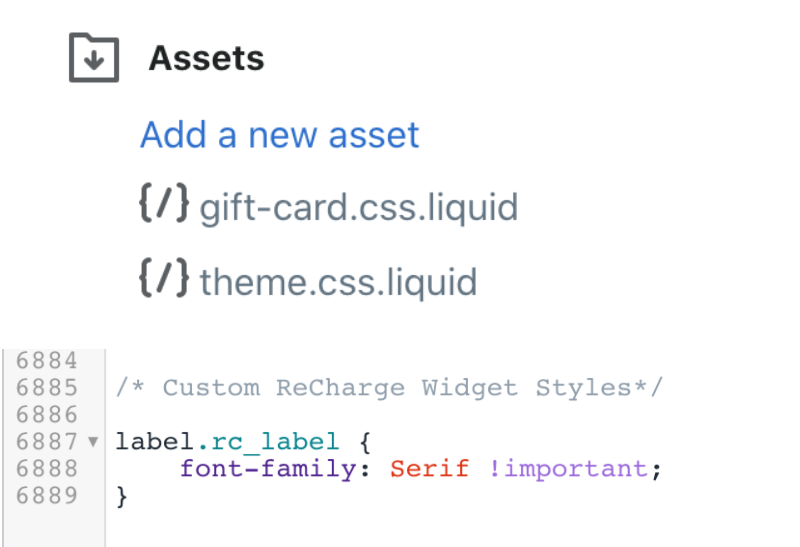
By default, the ReCharge subscription widget automatically renders in the appropriate location on a Shopify product page.
Moving the subscription widget
To customize the placement of the widget, the following things need to be taken care of: 1.Add the following code snippet to the theme’s JavaScript file. You can also add this script on the theme's header liquid template.

Define the CSS selectors within the selectors object, as they will determine
Creating your own subscription widget
1. Unpublish the widget so that it doesn’t automatically render on page load
2. Add the following snippet in the custom JavaScript file or inside of a relevant liquid template file
This creates a widget with more specific placement options:
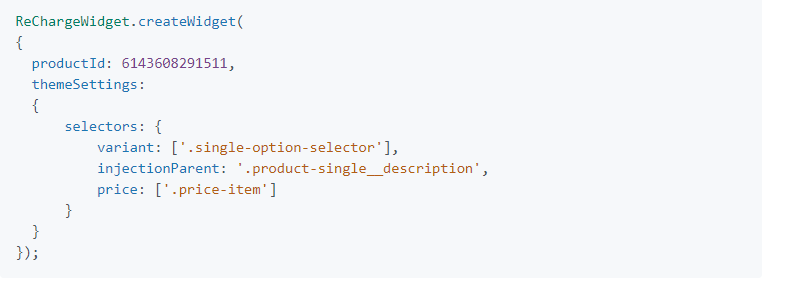
The CSS selectors defined in the selector’s object tell the widget:
Need to add the interface where can help a customer when they will forget the subscription accessing for a product

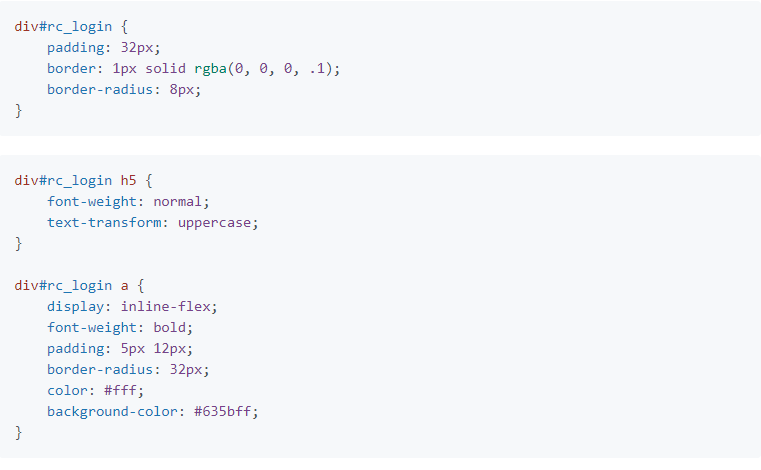
Customize the Account Access link CSS
Here can update the styling of the Account Access Link using custom CSS
Example
The Recharge app uses the shipping rates that you have set in Shopify Store to apply shipping costs, both at checkout and for recurring orders
Enable shipping settings

Shipping rates
The shipping rates for recurring orders can either be set to Dynamic or Retain
Dynamic- Whenever the shipping rates will be recalculated, a new recurring order is created every time. For example, if the shipping rate was original $10 but you recently lowered your shipping rate to $5, the recurring order will have the updated $5 rate.

Retain- The shipping rate of the recurring order will be the same as the rate the customer received at checkout and also it can be adjusted at any time by the Store Owner

Advanced settings
Handle shipping errors
Under the “Advanced Settings”, you can also choose how Recharge handles orders when there are no available shipping rates.
Display an error if no matching shipping rate is found – Orders will not be processed if there is not an available shipping rate or the product in the order does not meet the requirements of the available shipping rate.
Process orders if no matching shipping rate is found – Recharge will still process the order, but without an applied shipping rate.
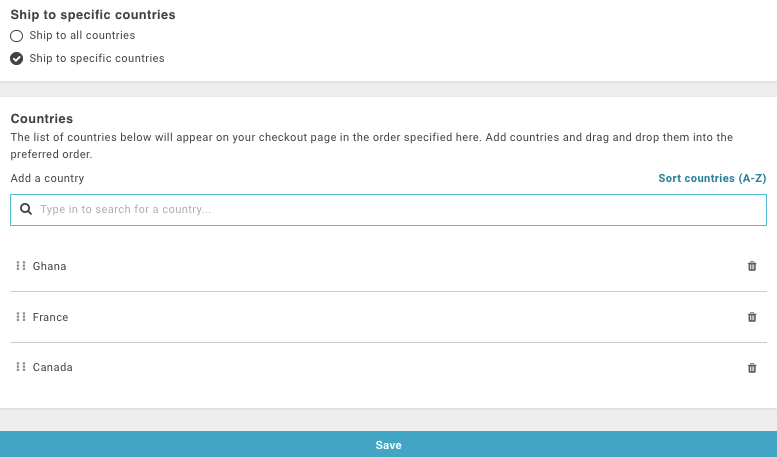
Ship to specific countries
If you do not ship to all countries, you will need to identify the countries you ship to in the Recharge app
Copyright © 2024 Website by NectarSpot Marketing, Automation, and Design Company